From the cookspainting recipe archive
How to Make Pepperoni for Pizza — From Scratch
Make cooked pepperoni-style pizza topping from ground beef, pork and spices. Includes no-casing options, thermometer checks, storage and eight FAQs.
By cookspainting · Content reviewed 2026-11-03. Review is not a claim of kitchen testing.
A cooked pepperoni-style topping for home kitchens
If you are looking for how to make pepperoni for pizza, start by deciding which kind you want. Traditional pepperoni is a fermented, cured sausage. This guide makes a fresh, fully cooked sausage with pepperoni-style seasoning, then chills and slices it for pizza. Its texture and flavor differ from commercial dry pepperoni, and it must be kept refrigerated.
The method starts with minced meat, not a packet of sliced pepperoni or a pizza dough recipe. No curing salt, starter culture, room-temperature drying or sausage stuffer is needed. The seasoning formula is an editorial recipe and has not yet been independently kitchen-tested; the handling and cooking limits below follow the linked food-safety guidance.
Cooked Pepperoni-Style Pizza Topping: ingredients & method
Ingredients
Check off items as you prepare them.
Ingredients
Equipment
- Digital kitchen scale
- Mixing bowl
- Baking parchment and rimmed baking sheet
- Instant-read food thermometer
Method
Keep the meat cold
Refrigerate the meat at 40°F (4°C) or below until you are ready to mix. If grinding it yourself, chill the grinder parts and cut meat first; otherwise use purchased ground beef and pork. Wash hands and clean equipment before and after contact with raw meat. Do not taste the mixture raw.
Mix the seasoning
Stir the salt, paprikas, fennel, garlic, black pepper, crushed red pepper and mustard together. Work the spice mixture and cold water into the ground meat with clean hands or a sturdy spoon until evenly mixed and tacky. Cook a small pinch completely to 160°F (71°C), then taste that cooked sample to check the seasoning.
Optional refrigerated flavor rest
Cover and refrigerate for up to 24 hours if you want to prepare ahead, or cook immediately. This rest seasons the meat; it is not fermentation or a preservation cure. Count all raw storage time from when the meat was purchased or thawed, not from mixing: raw ground meat should be used within 1–2 days or frozen.
Shape without a casing
Heat the oven to 350°F (177°C). On a parchment-lined rimmed baking sheet, form two compact logs about 1 1/2 inches (4 cm) in diameter. Pack out obvious air pockets so the cooked logs hold together. Leave space between them, and remove any plastic wrap used for shaping before baking.
Cook and measure the center
Bake until a thermometer inserted lengthwise into the center of each log reads at least 160°F (71°C). Start checking after about 20 minutes; diameter, starting temperature and oven performance change the time, so a timer or pink color cannot establish doneness. If poultry is substituted, use 165°F (74°C). Do not hang these fresh logs to dry or smoke them at a low temperature.
Cool promptly and slice
Transfer the cooked logs to a clean shallow container using clean utensils. Refrigerate promptly, within 2 hours of cooking, or within 1 hour when the room is above 90°F (32°C). Once cold and firm, use a clean sharp knife to cut thin slices, about 2–3 mm thick. Keep them cold while you prepare the pizza.
Use on pizza
Add the already cooked slices in a single layer over sauce and cheese on prepared pizza dough. Follow your dough recipe for oven temperature and baking time. For a fully heated topping, check that the reheated sausage reaches 165°F (74°C). Save unused slices in the refrigerator rather than leaving them on the counter.
Three ways to shape it without a casing
Small logs: use the main method for round slices. Keep their diameter even for more predictable cooking. A fresh cooked sausage may be more delicate to slice than cured pepperoni.
Thin slab: press the mixture into an even layer on a parchment-lined rimmed tray, bake to the same measured center temperature, chill and cut into small squares. Start checking earlier than for logs; thickness determines the time.
Small patties or crumbles: form thin coins or break the mixture into a skillet and cook completely, checking 160°F (71°C). These give a pepperoni-style flavor when you do not need circular cured-sausage slices. No shaping option makes the product shelf-stable.
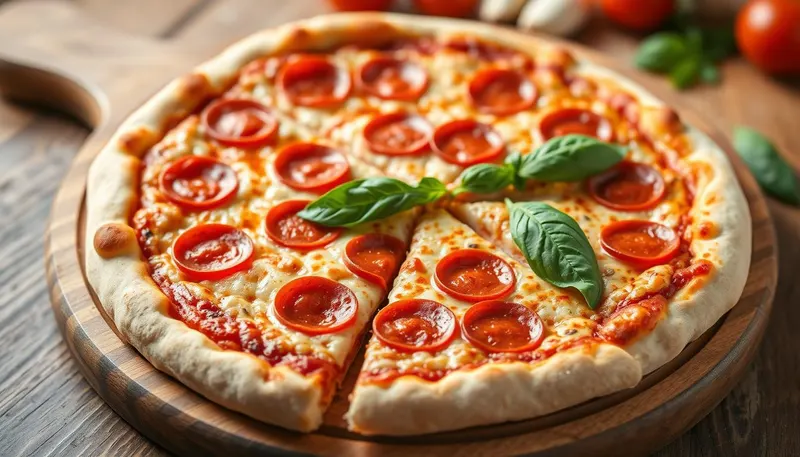
Putting homemade pepperoni-style slices on pizza
Use a light, even layer so the topping does not weigh down the dough. Leave gaps for cheese to bubble through. If excess fat collects after cooking the sausage, blot the cooled exterior with a clean paper towel before slicing. These slices can brown, but they are not guaranteed to cup like commercial pepperoni.
For a pizza base, follow our Margherita dough and baking method, replacing the basil topping with the fully cooked slices, or try sourdough discard pizza dough. Keep the sausage preparation and the dough's rising time separate when planning dinner.
Safety, cooling and storage
Traditional fermented pepperoni needs a validated formulation and controlled fermentation, humidity, drying and pathogen-reduction steps. A 24–48 hour seasoning rest, salt, paprika or a casing does not validate that process. Use an established specialist process if you want dry-cured sausage; do not convert this fresh recipe by hanging it at room temperature or simmering it after an uncontrolled drying stage.
Keep this cooked topping at 40°F (4°C) or colder and use it within 3–4 days. For longer storage, freeze portions with parchment between slices; aim to use them within 1–2 months for quality. Thaw in the refrigerator. Reheat leftovers to 165°F (74°C). Discard perishable food left out beyond the 2-hour limit, or 1 hour above 90°F (32°C); smell and appearance cannot prove it is safe.
Frequently asked questions
Is this the same as traditional dry-cured pepperoni?
No. It is a fresh cooked sausage with similar seasonings, intended as a refrigerated pizza topping. It will not have the same fermented tang, dense texture or keeping properties.
Do I need curing salt?
This fresh cooked method uses regular salt for seasoning and does not call for curing salt. Do not add an arbitrary amount of nitrite or substitute curing blends for table salt. A cured product needs its own validated recipe.
Can I refrigerate the seasoned meat for 48 hours?
The optional rest here is up to 24 hours, within the meat's total 1–2 day raw refrigerated storage window. Time already spent in the fridge counts. Cook sooner or freeze if necessary.
Can I make it with only beef?
You can use all ground beef. Fat content affects texture and moisture, so results will differ. Check 160°F (71°C) in the center. A poultry version needs 165°F (74°C).
Why do the slices crumble?
Uneven mixing, loose shaping or slicing before chilling can make a fresh sausage crumble. Mix until tacky, compact the logs and slice cold. The slab or crumble methods are useful alternatives.
Should I boil or air-dry the logs?
Neither is part of this recipe. Bake the fresh mixture to its measured safe internal temperature. Uncontrolled air-drying is not a safe shortcut to making fermented pepperoni.
Can the raw topping cook directly on the pizza?
Cook it separately first using this method. Pizza crust and cheese can be ready before a raw meat topping reaches its required center temperature.
Can I freeze the slices?
Yes. Cool and portion the cooked sausage promptly, separate slices and freeze in a sealed container. Thaw in the refrigerator, then reheat to 165°F (74°C).
Food-safety sources
- USDA FSIS: sausages and food safety — fresh versus fermented sausage.
- FoodSafety.gov: minimum internal temperatures — thermometer targets.
- FoodSafety.gov: cold storage chart — raw meat storage.
- USDA FSIS: leftovers and food safety — prompt cooling and reheating.
Sources checked November 3, 2026. These sources support handling guidance, not a claim that this seasoning formula has been tested by those organizations.